Two-factor authentication in Gmail is one of the security measures that can be taken to prevent unauthorized access to an account. But the question is, how do we enable two-factor authentication in Gmail? To answer this question, first, you need to know what the Google verification code is. After that, you will realize that the only way to access your account is to receive a voice or text message from Google. That’s why there is no way to bypass two-factor authentication in Gmail. In the rest of this article from SPY24, we will discuss how to activate and deactivate two-factor authentication in Gmail.
In this tutorial, we will introduce you to the two-step verification feature of Gmail or Gmail two-factor authentication.
First, we will explain the details of this feature and the reasons why it is necessary to enable it. After that, we will show you how to activate it. To learn more, you can read the two-factor authentication article.
🔴⚫ Note: If you have not created an email account on the Gmail service yet, you can read the new email account creation article + step-by-step video tutorial.
READ More: How to Permanently Deleting a Gmail Account (Step-by-step)
What is the importance of Gmail’s two-step verification?
As you know, stealing email passwords is very easy for hackers. Factors such as using the same passwords for more than one website, downloading software from the Internet, clicking on links in unknown emails, and so on can all put your passwords at risk.
For example, if someone gains access to your Gmail account, they can:
- Read and delete all your emails.
- Send unwanted emails to your contacts by impersonating them.
- Use your email to access passwords, bank accounts, etc.
- All of these can put your important information at risk.
For example, when a user goes to the Fa hosting site and buys hosting, their hosting account information is immediately sent to them via email after payment. The user launches their website with peace of mind, unaware that their hosting account information is still in their email list. At this point, if a hacker enters your email, they can easily extract and use important information.
What is a Google verification code?
By using two-factor authentication for Gmail, you can prevent unauthorized access to your Gmail account. Even if someone gains access to your email address and password, they cannot access your email account as long as they do not have access to your phone number.
If you activate two-factor authentication for your Gmail account, the way you log in will be different! In addition to entering a password, you will be asked for additional information to verify your identity. Only if you can successfully pass through the second layer of security created on your email account can you access your Gmail account. You can take action in the following three ways:
- Verification via phone number through text message or voice call
- Google identity verification application for sending verification code
- A second alternative, such as a security key or backup code
In identity verification through a phone number, a security code is assigned to you via text message or a voice call from Google. By entering the received code in the desired field and confirming it, your identity will be verified, and you can access your Gmail account. Additionally, an application has been developed by Google that will send security codes to you, eliminating the need for text message or voice call verification with your phone number.
It’s interesting to know that you can use a security key for identity verification, in which case you will need a flash drive containing the key file and a USB port.
All of these aspects will be further explained in more detail below. By enabling two-step verification on your Gmail account, you create two layers of security. The first layer is your password, and the second layer is one of the security measures (security code, security key, etc.). The only way to access your emails is by passing through the second layer.
In simple terms, it can be said that accessing your account is only possible through what you know (your password) and what you have (security key or your mobile number).
How can we enable two-factor authentication for Gmail?
Please note that to activate this feature, you must have Google Chrome version 38 or higher. To enable two-factor authentication on your Gmail account, follow these steps:
1- Go to myaccount.google.com to access your Gmail account page.
2- Enter your Gmail email address and password. Click Sign in.
3- Enter https://safety.google/authentication/ in your browser.
Click the Get Started button.
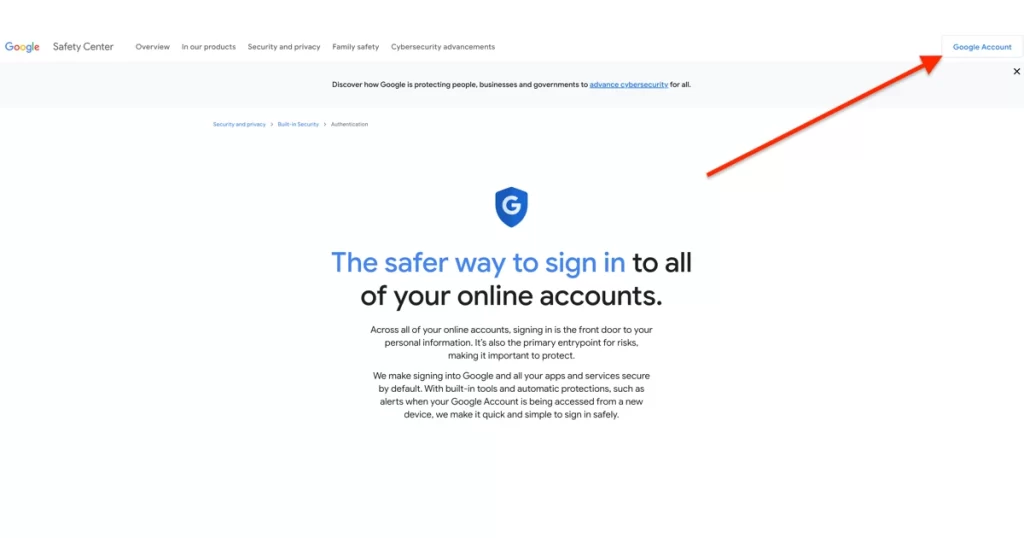
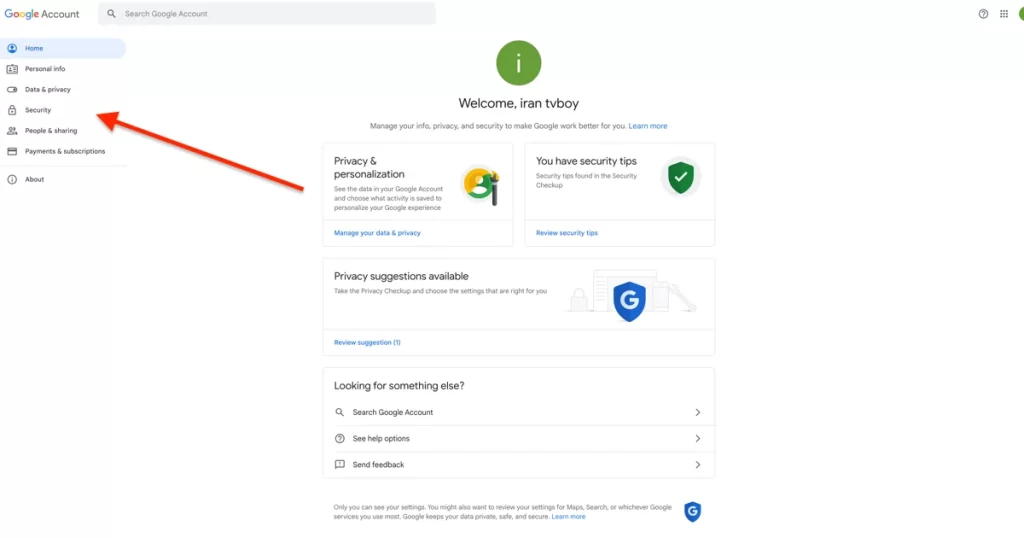
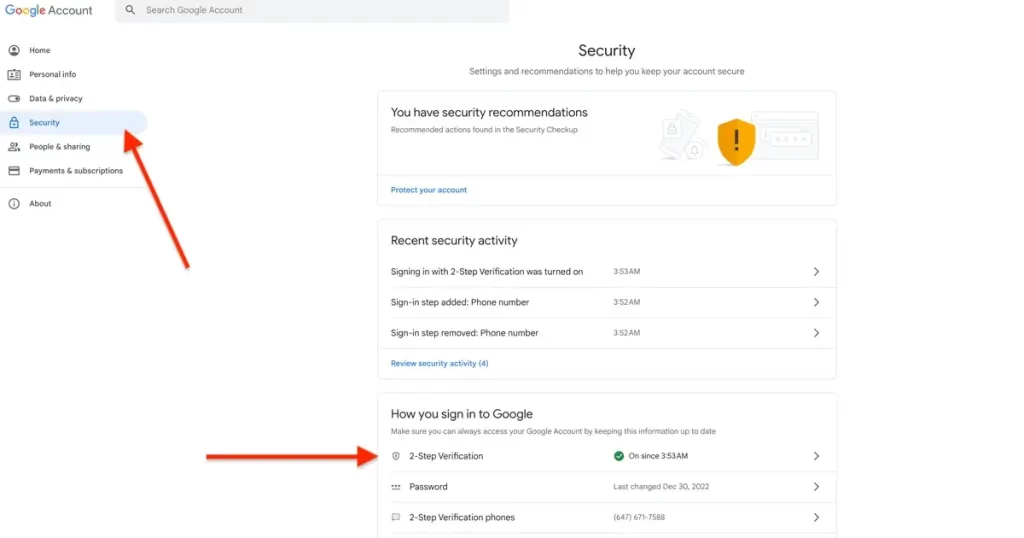
4- Click on the “Security” option on the left side.
5- In this step, you will be asked for your Gmail password again. Type it in and click on “next”.
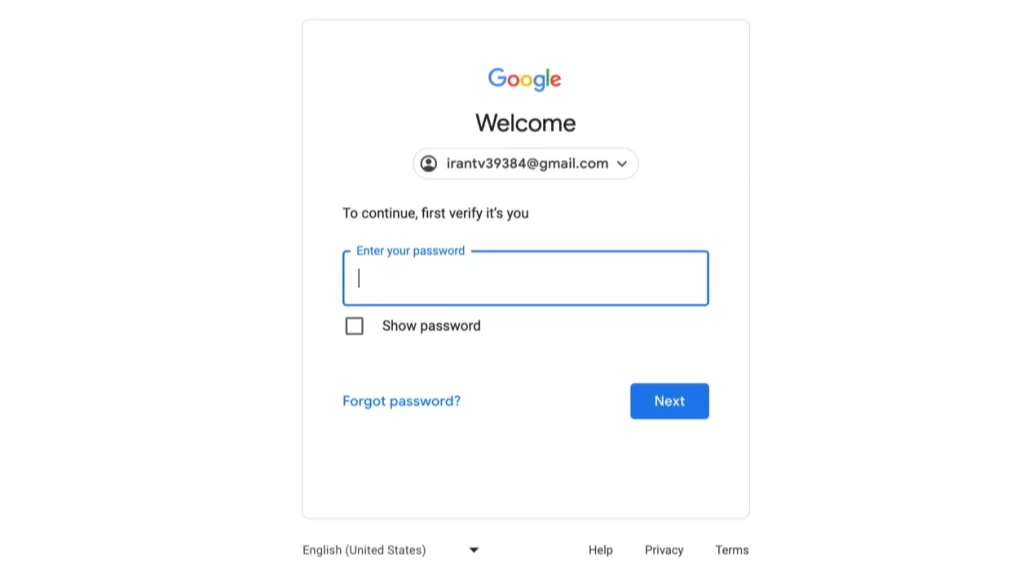
You have some important steps ahead in step 4. Follow the instructions carefully and enter accurate and precise information. Because if you enter incorrect information or forget this information, your access to your Gmail account may be blocked.
6- In this step, you need to enter your mobile number. Note that this is your primary number, and all verification codes will be sent to this number.
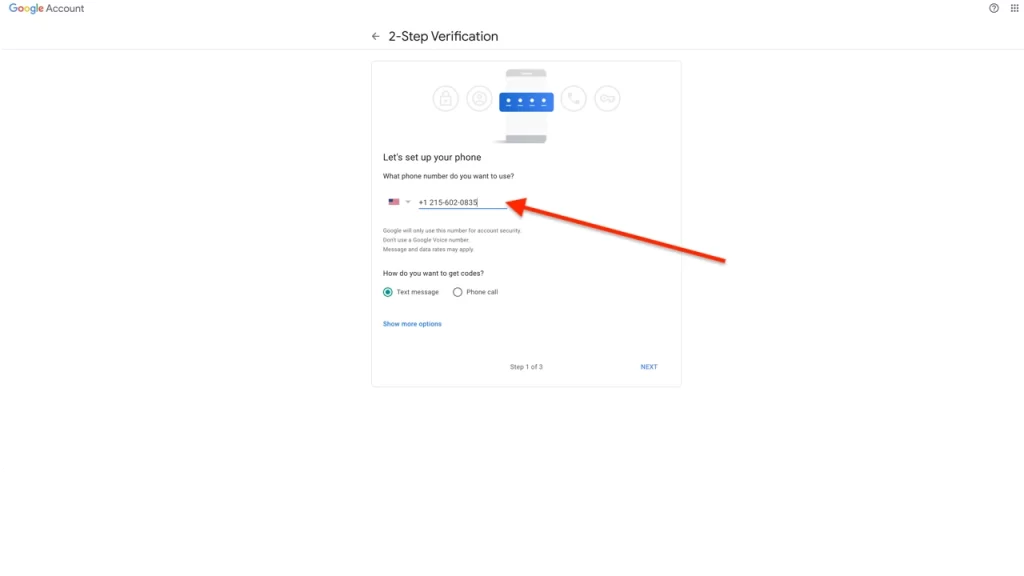
In the Phone number section, select your country and then enter your mobile number.
In the “How Should We Send You Codes?” section, you must select how to receive verification codes on your mobile number. The options available in this section are:
Text Message (SMS): By selecting this option, verification codes will be sent to you via text message.
Voice Call: By selecting this option, verification codes will be read to you in a voice call, and you must note it down or remember to use it.
For example, we select the Text Message option. Finally, click on “next”.
7- Now is the time to verify your phone number.
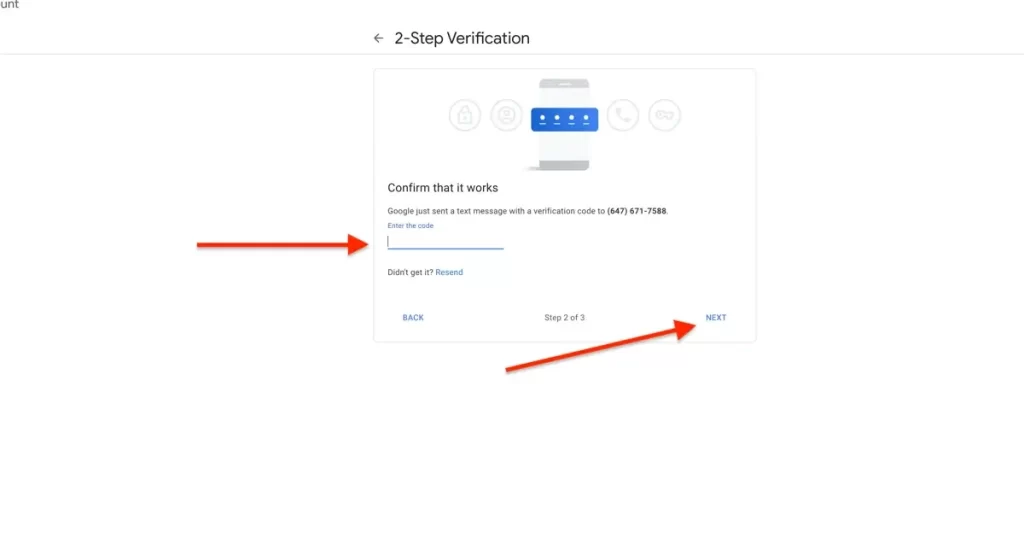
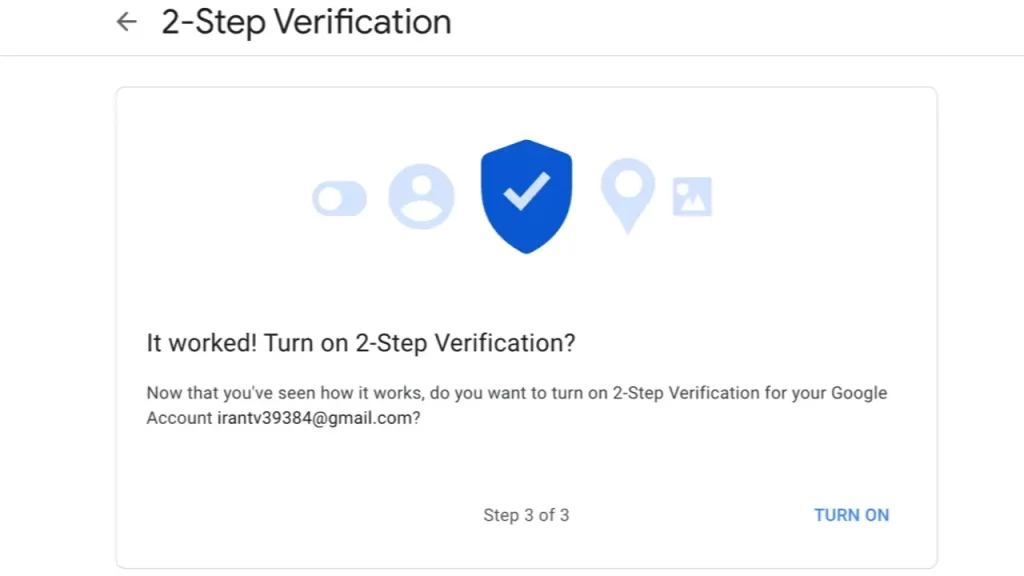
8- At this stage, Google will send you a text message containing a verification code. This process may be instant or slightly delayed. After receiving the code, enter it in the “Enter Verification Code” section and click on “Next” or “Verify”. Now two-step verification for Gmail will be activated for you.
9- After completing the two-step identity verification activation process, an email will be sent to you providing information about this feature.
Changing Google Two-Step Verification Settings
By clicking on the “Security Checkup” link in your email or logging into myaccount.google.com and, clicking on the security section, then going to the two-step verification section, you can make changes to your desired settings.
Now the page related to the two-step verification settings is displayed. This time you can view or edit the information you entered during activation. This section includes the following:
- Voice or text message
- Backup codes
- Authenticator app
- Support phone
- Security key
- Trusted devices
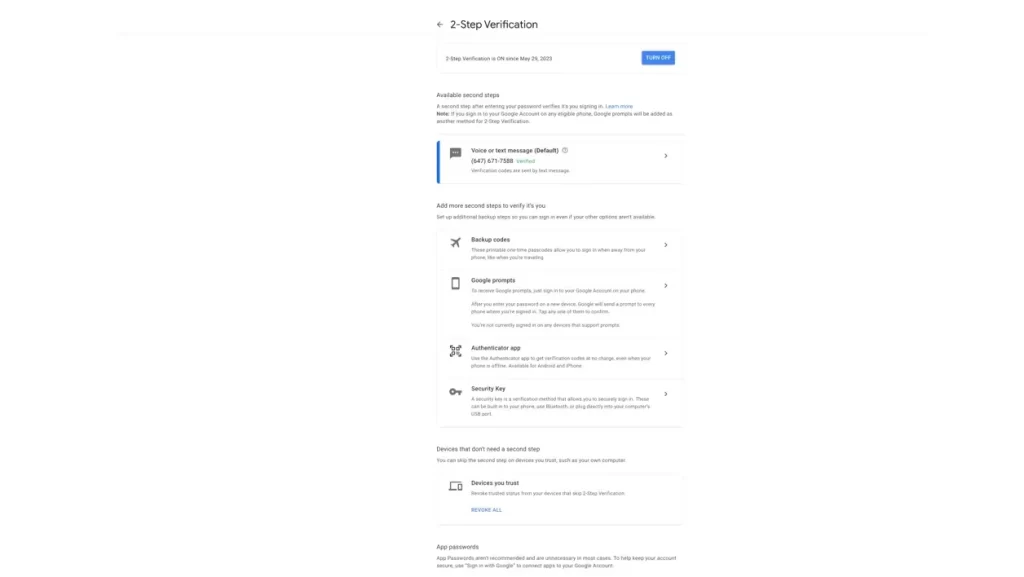
1- Changing Gmail’s Two-Step Verification Number
In the settings section, under “Voice or Text Message,” you can see your mobile number. By clicking on it, you can change this number. Clicking on the Text Message link in the Code Send via section allows you to change how you receive codes.
3- Google’s Verification Codes
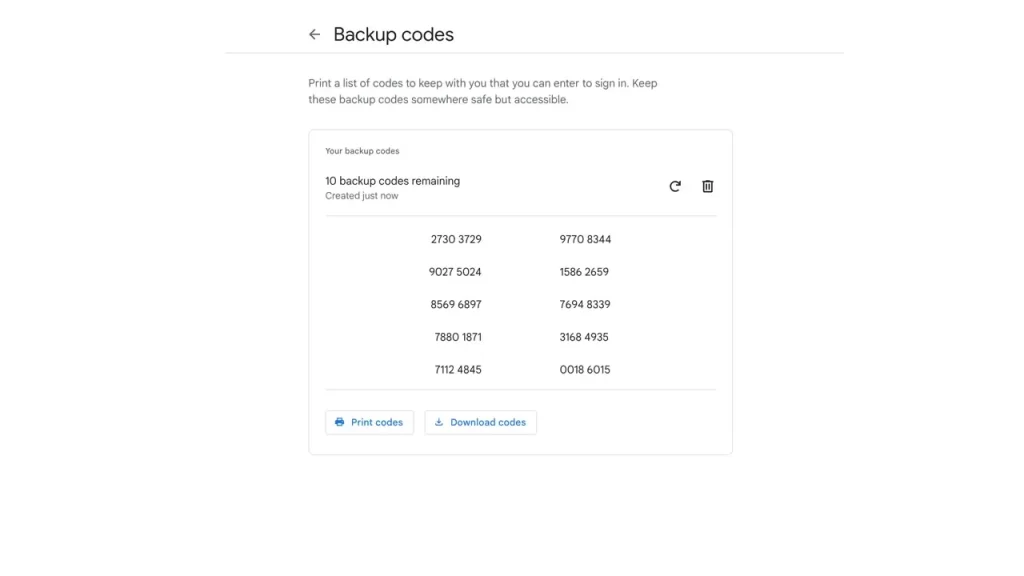
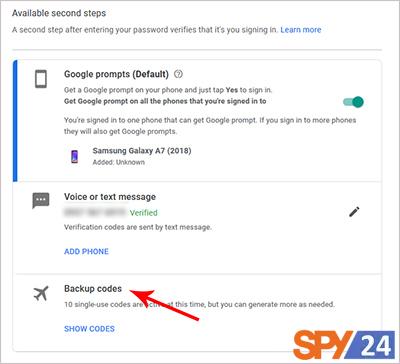
From the Backup Codes section, you can get some backup verification codes. Google has also provided you with a set of backup codes that you can use in an emergency. You can also use these one-time-use backup codes when traveling. Print them out and carry them with you.
Click “Print” or “Download” to open a page with ten backup verification codes for you. On this page, by clicking on “Print,” you can print it, or by clicking on “Download,” you can save it as a text file on your computer.
3- What is Google Authenticator?
With the Authenticator app, you can use Google Authenticator to receive verification codes for Android, iPhone, and BlackBerry devices. We will explain how to activate it below.
How to activate Google Authenticator
This option is useful when your phone or mobile data connection is disconnected or you do not have access to your phone number. In this case, you can receive your secure login codes through the Google Authenticator app installed on your mobile phone without needing your mobile number.
1- To activate this option, click on the Settings button.
2- At this stage, select the type of your phone system. Choose Android, for example.
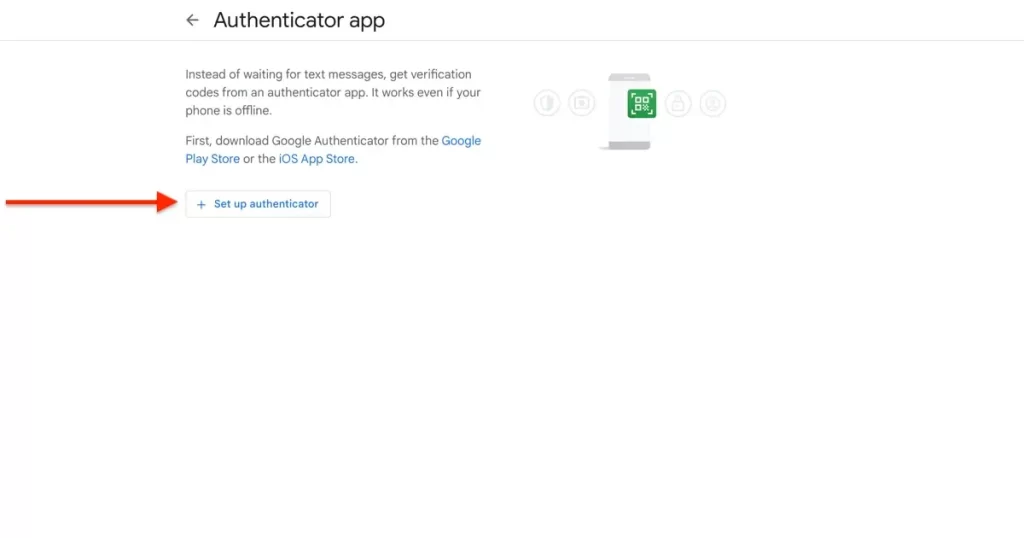
3- Now, you need to download the Google Authenticator application.
To download this application, go to the Google Play Store or the iOS App Store from your mobile phone and download and install Google Authenticator. After installing the application on your mobile phone, open it and configure it.
4- Open the application menu and select Set up an Account.
5- Then select Scan a barcode.
6- Use your mobile camera to scan the specified code.
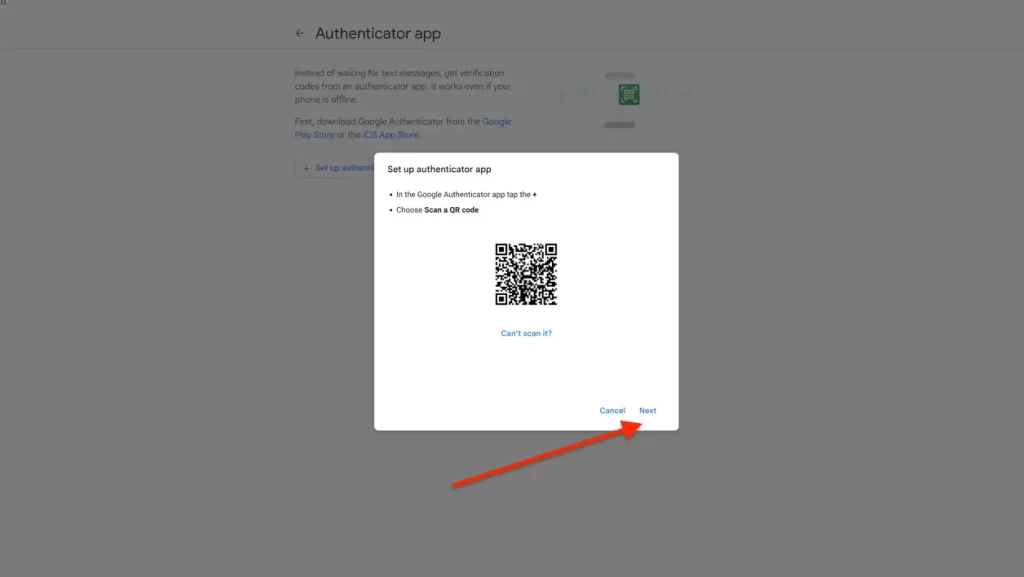
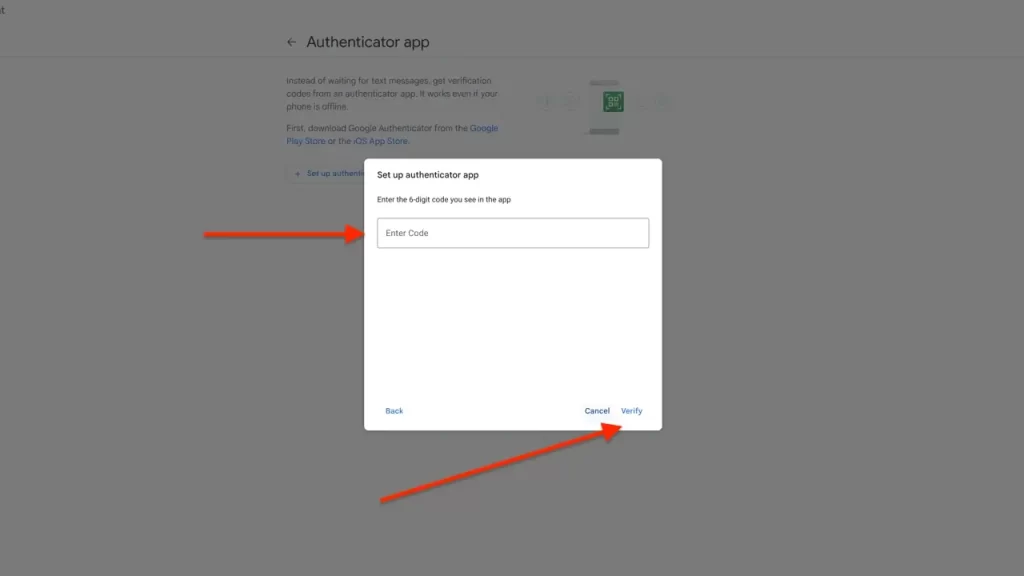
7- Then, a 6-digit code will be given to you. Type it in the appropriate field and click on Verify.
4- Google Account Support Phone
From the “Support Phone” section, you can specify another mobile number as a backup number for emergencies. In this case, if your access to your main number is cut off, Google will also have other numbers available to send verification codes.
- To do this, select the USA flag and enter your desired mobile number.
- Select how to receive the code.
- Click on the “Done” button.
- After that, you will see the message “Verification codes are sent by SMS.”
- Click on “Done”.
At this point, your backup number has been added and you can view, edit, or delete it.
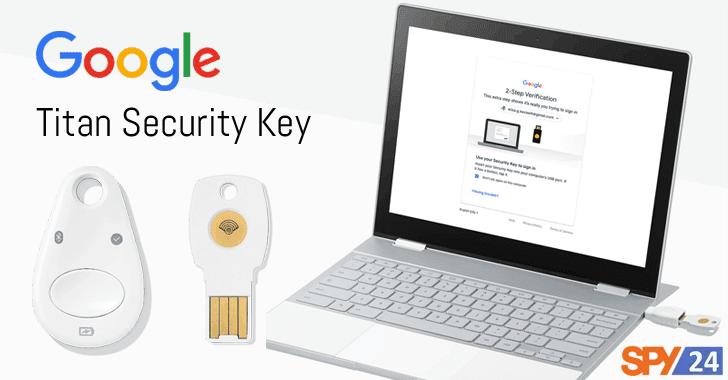
5- Google Security Key
You can use a security key as a second step in two-step verification.
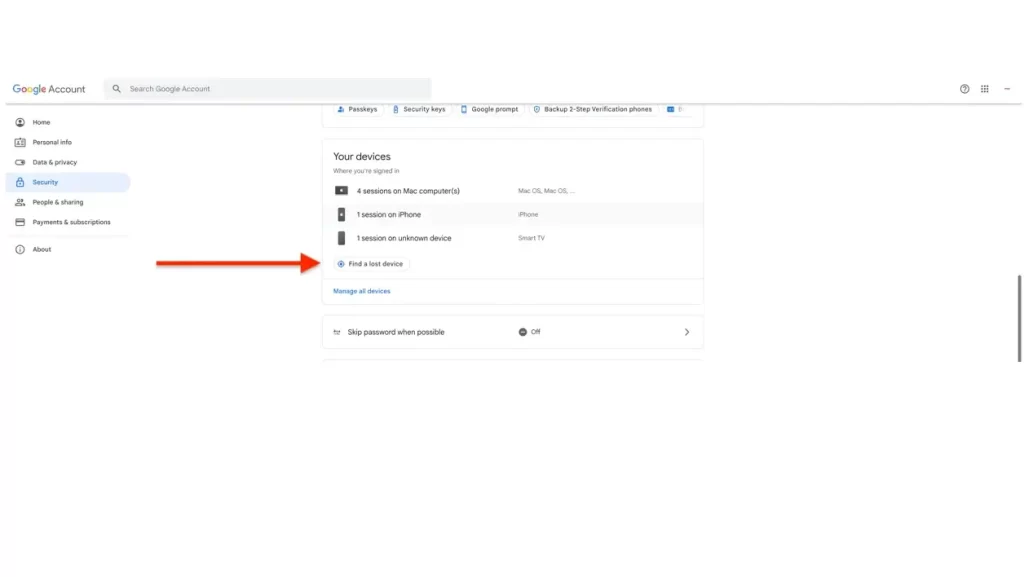
6- Trusted Devices
From the App Specific Password header, you can review settings for apps connected to your Gmail account. Including:
- iPhone email apps
- iPad
- Microsoft Outlook
- Mac email apps
- and more…
To do so, click on Manage application-specific password.
- On the new page, select the desired application from the Select app section.
- Select the device connected to your email from the Select device section.
- Click on the Generate button.
- At this stage, a window titled Generated app password will appear showing your password. Then click done.
To delete the generated password, click Revoke next to it.
You can also apply or edit settings related to your computer and other registered computers in the Registered Computers header. By clicking Require Codes in the This Computer section, you can also remove this computer from the Trusted List. To do so, follow these steps:
- Click Require Codes.
- From the opened window, click Remove This Computer From My Trusted List.
- After that, logging into your Gmail account by this computer will also be done through 2-step verification.
If you want to re-verify this computer, select Register This Computer from this section. You can also view and edit the settings for other registered computers in the Other Registered Computers section.
Disabling Gmail’s 2-step verification
The steps to disable 2-Step Verification are as follows:
- Go to myaccount.google.com to log in to your Gmail account.
- Enter your Gmail email address and password.
- Click Sign in. (If you haven’t set up your system as a trusted computer, you’ll need to go through 2-step verification steps.)
- You will then enter your Gmail account settings.
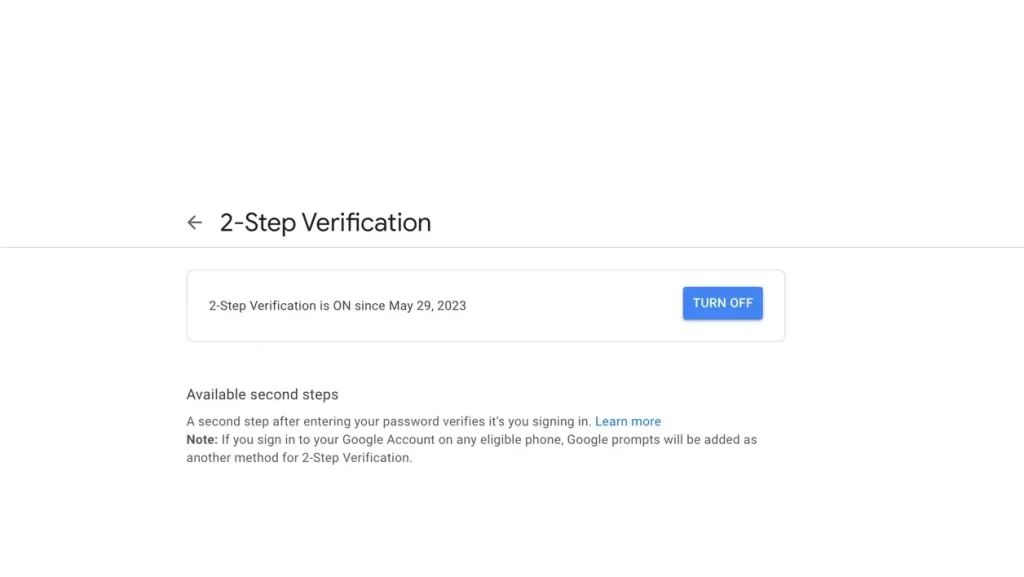
- In the Security section, click 2-Step Verification.
- Click Turn off according to the image.
Forgetting your Gmail password
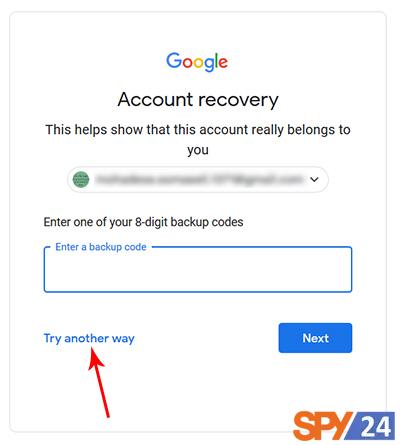
Each of the above cases is listed in the Gmail Authentication and Security Actions list and can be used to log in. For example, in the image below, three items have been defined as authentication and backup codes. So if I forget my password, I can recover my Gmail with one of these three methods.
For this case, when you log in to your Gmail, click on the Forgot Password option. Like the image below, click on Try another way each time until you reach the point where you can recover your Gmail through it. If you have 8-digit digital codes, when you get to Enter one of 8-digit backup code, enter one of the unused 8-digit codes in the field. Otherwise, use other methods such as recovery email or phone number that you previously entered.
Finally, we recommend using this feature to improve security and prevent hacking and compromising your information. Gmail’s 2-step verification will prevent unauthorized access to your account. In this article, we tried to explain all relevant settings as well as how to enable and disable Google’s 2-step verification.
Conclusion:
By following any of the above methods, you can easily enable Gmail’s two-factor authentication process. Both methods are reliable and easy to work with. It should be noted that using the Google Authenticator app is a better choice for people who use multiple apps and websites with two-factor authentication because this app can become a central hub for logging into all online profiles and accounts.
Google Prompt offers faster and more secure access, but it only makes sense when you need to log into your account multiple times during the week. In fact, choosing the best two-factor authentication application depends on your personal needs. Some of the best password management apps, such as Password1 and LastPass, also offer two-factor authentication services.
Also, if you are a member of social networks, you can take action right now to increase their security and enable two-factor authentication for Twitter, two-factor authentication for Instagram, two-factor authentication for Telegram, and two-factor authentication for Apple ID.
READ More: How To View Devices Connected to Gmail and Remove Them (1 minute)
Why am I not receiving the verification code for Google authentication?
As we mentioned above, you can use the methods described to solve this problem.
Why can’t I access my Gmail account after entering the code?
This may be because the time in your Google Authenticator app is not set correctly. To fix this problem, it’s best to adjust the clock and date on your system. You can read the article “How to Set Windows Clock” for this.
Who needs two-factor authentication more?
Anyone who feels they have information on their Gmail or Google account that they don’t want hackers and unauthorized individuals to access should consider enabling two-factor authentication. Generally, regular users can choose not to enable this feature, but those with high-ranking jobs and are part of an organization’s personnel should definitely activate Gmail’s two-factor authentication service.
Is it possible to log in to Gmail without two-factor authentication?
Google has the strongest active servers in the world, so even thinking about bypassing Gmail’s two-factor authentication or hacking it is somewhat unreasonable. However, if you forget your second password for any reason, you can contact Google support via another account and share your issue with them.