Perhaps you’ve just purchased a new iPhone and are unsure how to transfer your previous email to the new iPhone or add a new one. Many iPhone users dream of having access to their email anytime and anywhere. However, manually configuring an email account on an iPhone can be somewhat challenging. In this article, I will explain step by step how to configure your email account on your iPhone.
The hardest part of manually configuring your email account is knowing what information to enter. Once you have this information, the rest of the email account setup is easy. Therefore, before we begin, let’s find out what information we need to have at our disposal.
Email Address: The email address you are trying to set up on your iPhone.
Password: The password for the email you want to set up on your device.
Server Name: Mail.yourdomain.com (for example, for this company’s website SPY24, the address is mail.Spy24.io). If this method does not work, you can find the necessary information for this section by logging into your webmail and following the path to Settings and then Email Accounts.
You can request support from your server or hosting provider, or if you are using cPanel, go to the cPanel section of your site, open the Email Accounts option, select your email, and open the Connect Devices option to display the email service information.
- Username: [email protected]
- Password: Use your email account’s password.
- Incoming server: mail.example.com
- IMAP Port: 888, POP3 Port: 999
- Outgoing server: mail.example.com
- SMTP Port: 134
Note: You can use any email service; this tutorial includes manually entering account settings.
Now that we have prepared this information, let’s proceed to set up your email account on your iPhone.
Note: We are using iOS 17.3 operating system in this tutorial.
How to Set Up an Email Account on Your iPhone or iPad
To set up email on your iPhone device, follow the steps below:
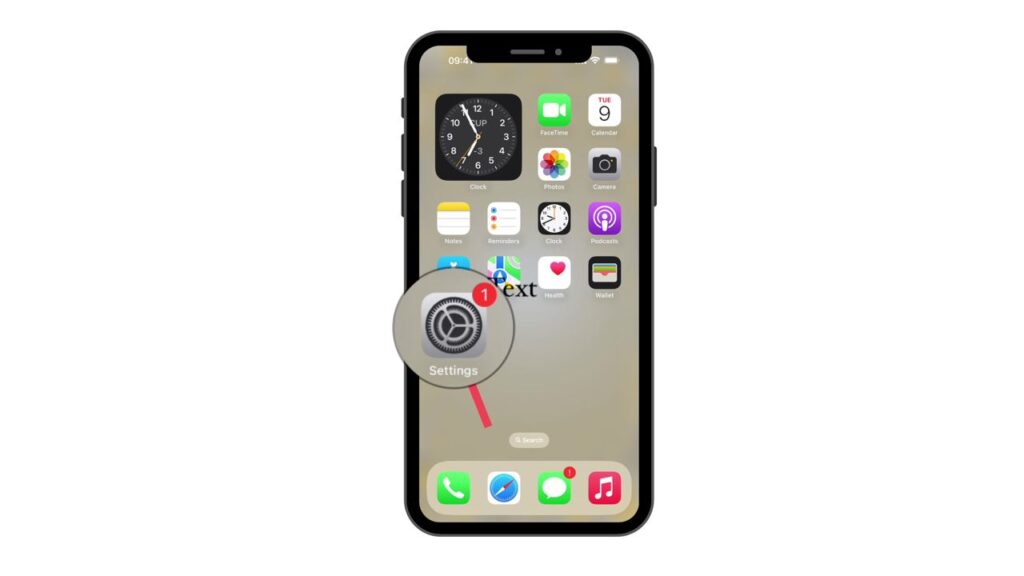
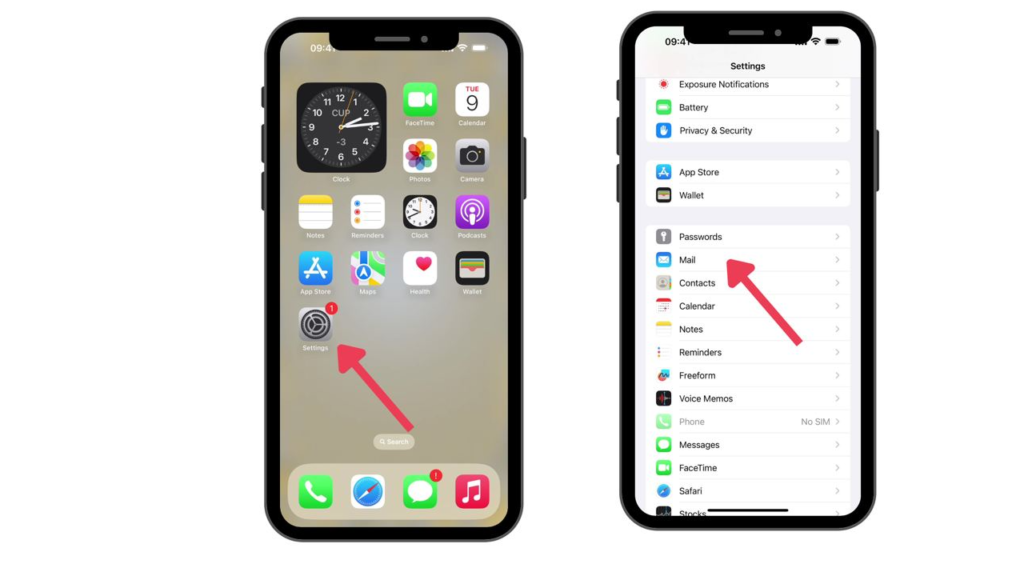
Go to your iPhone’s Settings and select the Mail option.
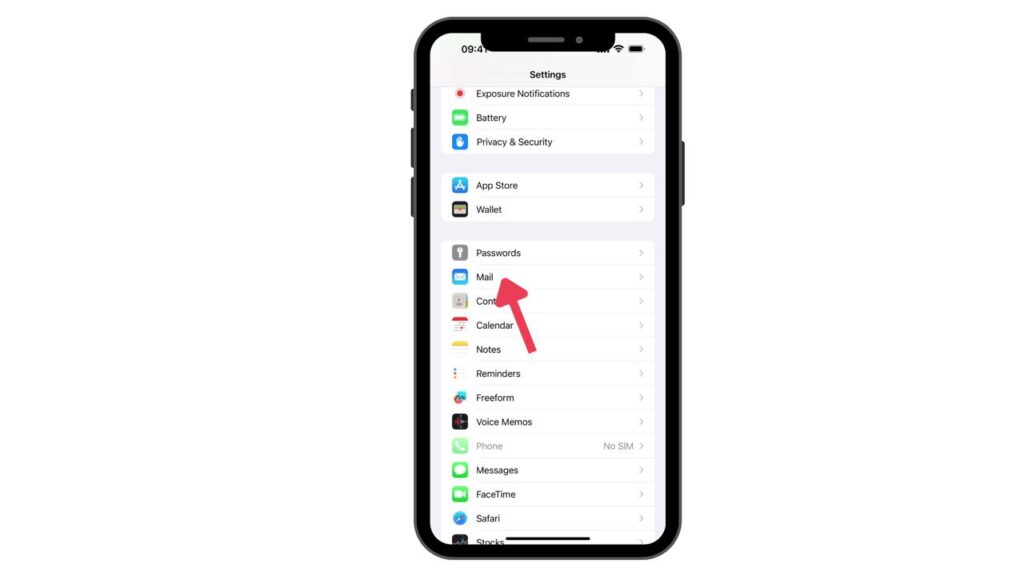
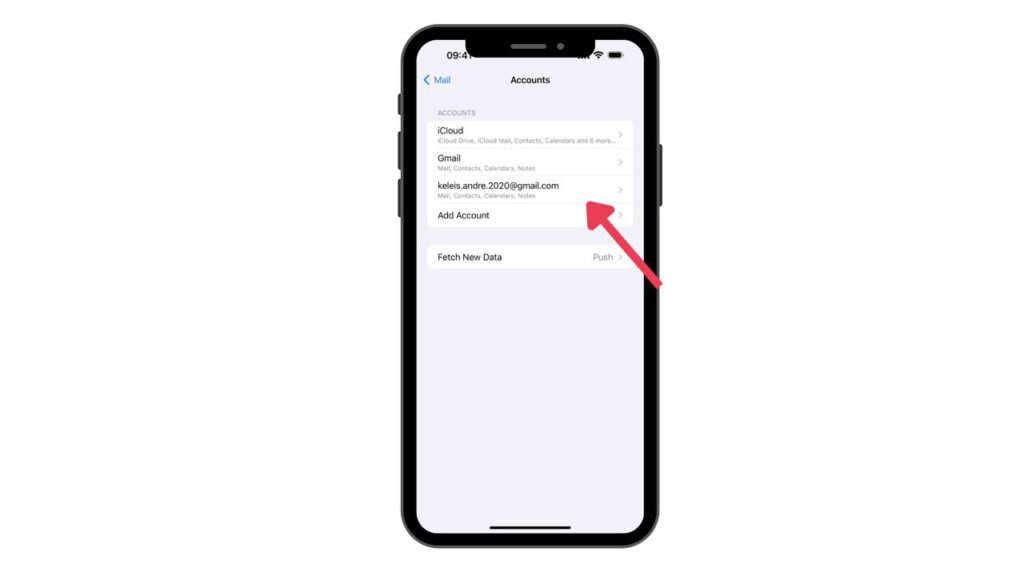
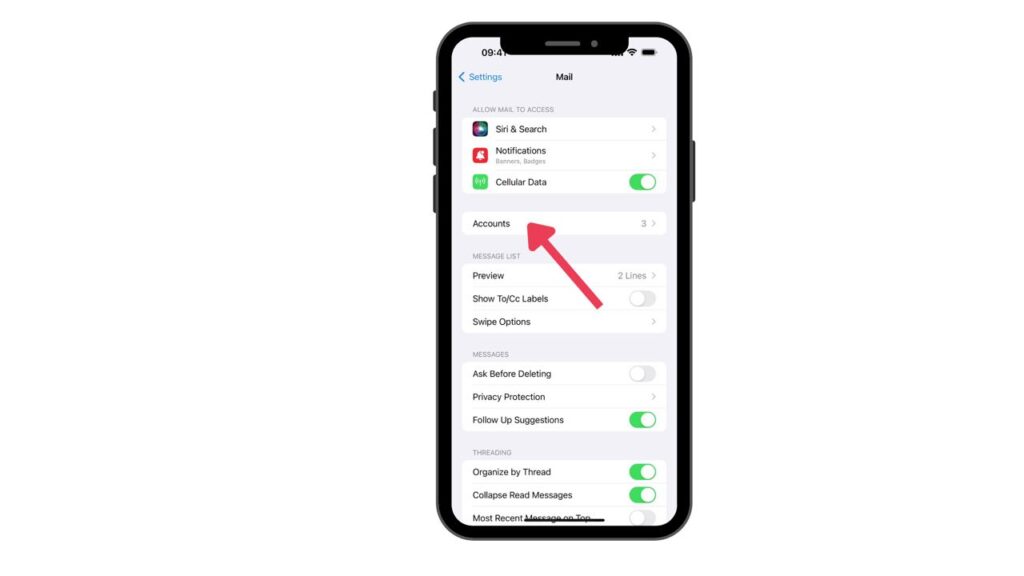
Choose Accounts.

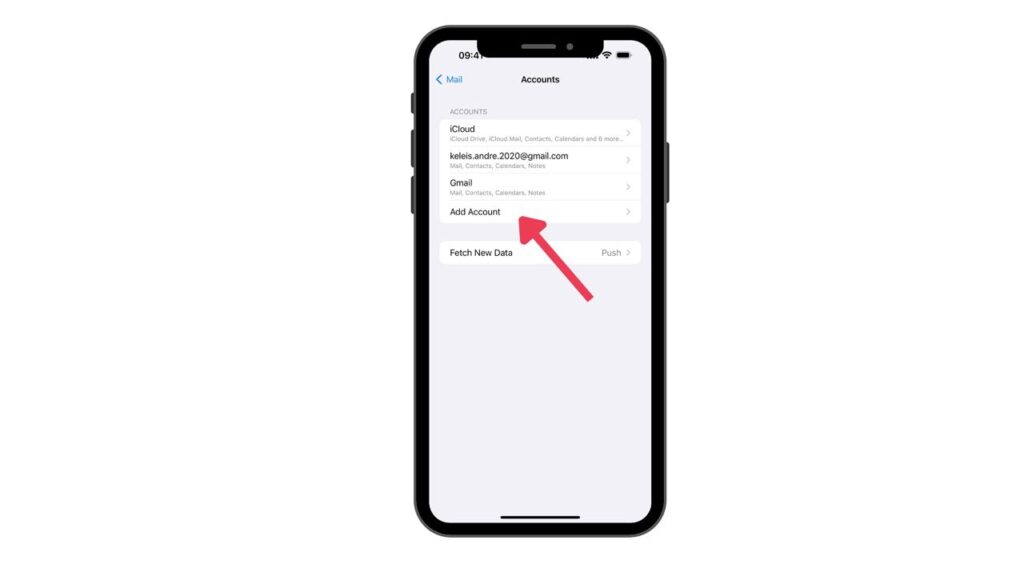
In this section, select Add Account.
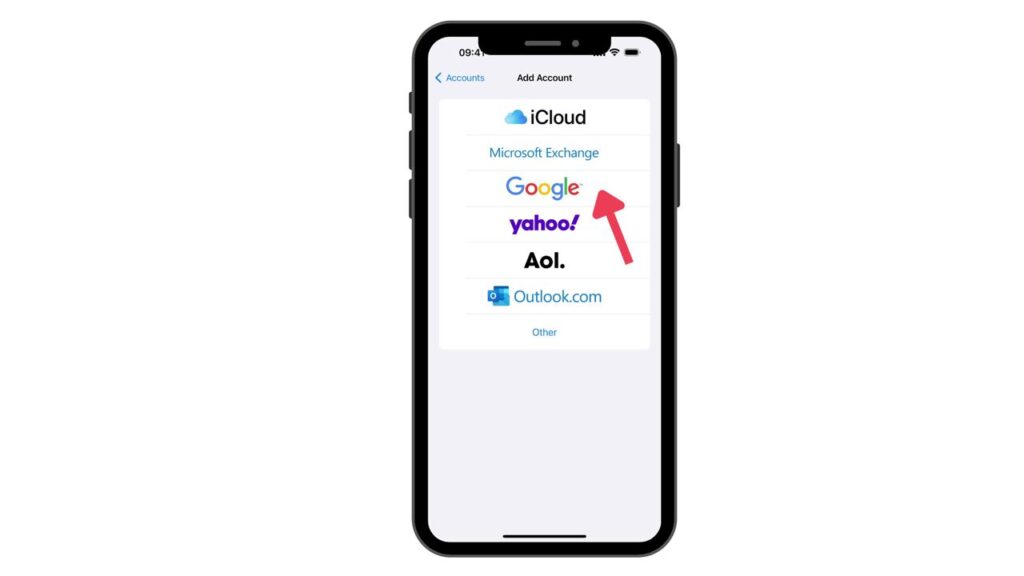
Here, you will see the names of email services. Select the one you wish to add, for example, if you want to add Gmail, choose Google. Then, a pop-up window will appear, asking for the username and password of the chosen account.
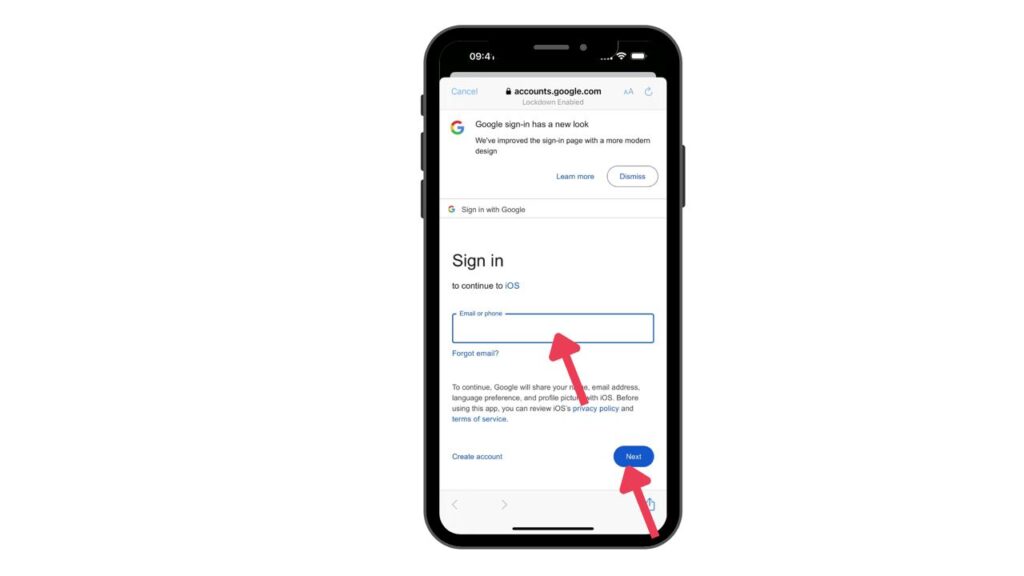
Upon selecting the desired service, a pop-up window will open, requesting the password for the chosen account. Enter your information in this section.
After entering your information, you will be provided with details about this operation and asked for final permission to proceed. Do not worry, this process is entirely under the control of the destination company, like Google, and if you notice, the opened window is HTTPS and has high security for the transfer, so there is no need to worry.
After entering the information, select Next and wait for your account to be verified.
Choose the information you would like to use from your email account, such as contacts or calendars.
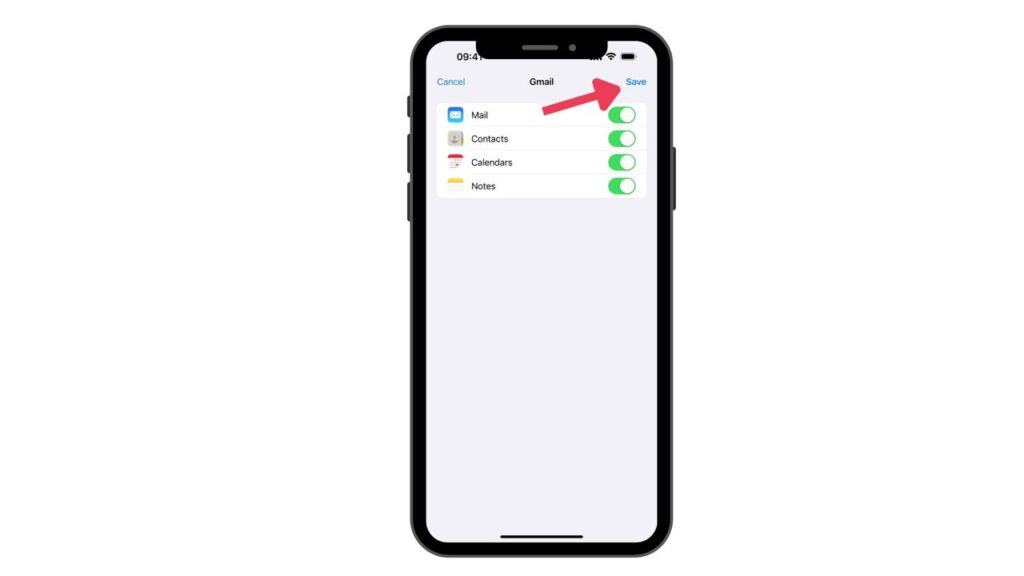
Tap Save.
This action connects you to your email account, so messages will be downloaded to your iPhone in the Mail app, and you can send your messages through the Mail app with your email account.
Step-by-Step Guide to Adding a Work Email to iPhone iOS 17.3
Please follow these step-by-step instructions to set up your email account on iPhone devices running iOS 17.3:
1. As shown in the image below, first go to the “Settings” on your iPhone and select the “Mail” option.
2. Next, as illustrated below, choose the “Accounts” option.
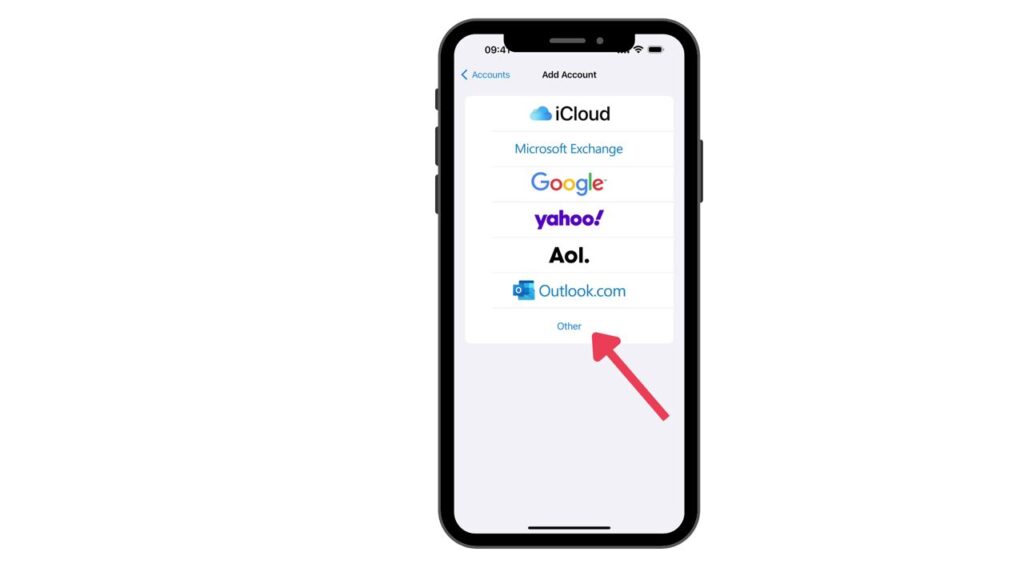
3. In accordance with the image below, select the “Add Account” option.
4. At this stage, choose the “Other” option.
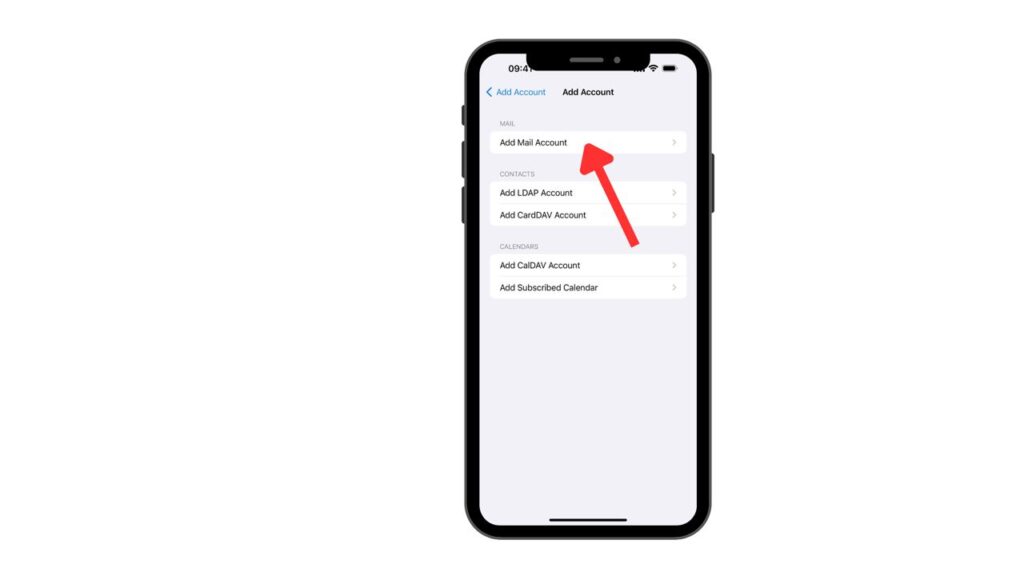
5. In step five, as shown in the picture below, select the “Add Mail Account” option.
6. Enter your email account details in the respective fields:
- Name: The name recipients will see when they receive an email from you.
- Email: The email address you wish to add.
- Password: Enter the password for your email account.
Description: Enter a name for your email account to distinguish it from other email accounts on your mobile device.
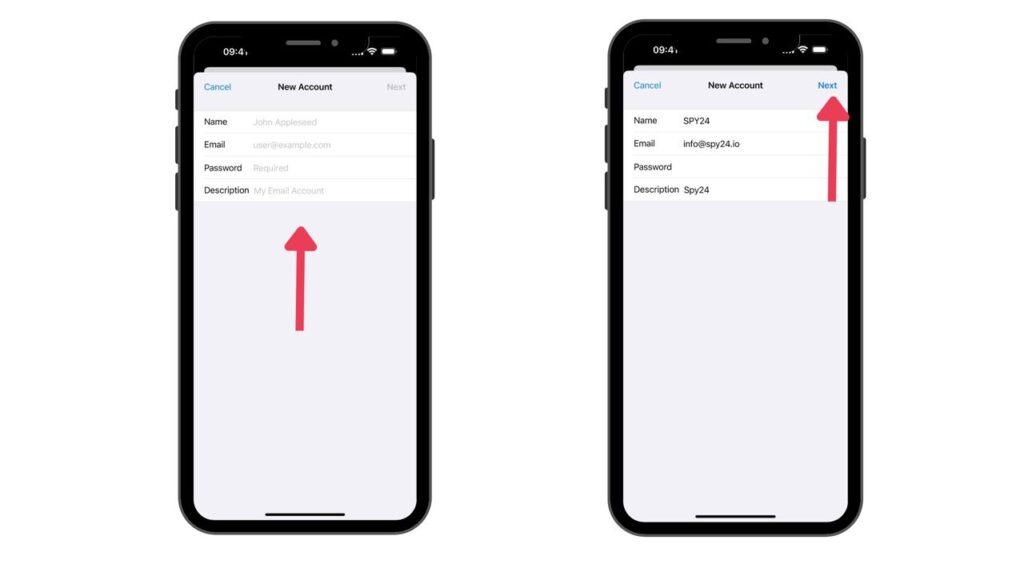
To continue, tap “Next“.
7. If you are still getting familiar with this section, it is recommended that you choose IMAP as the email communication protocol type.
8. Enter your email server settings:
- Incoming mail server:
- Host Name: mail.example.com
- Username: Your email account
- Password: Your email account password
- Outgoing mail server:
- Host Name: mail.example.com
- Username: Your email account
- Password: Your email account password
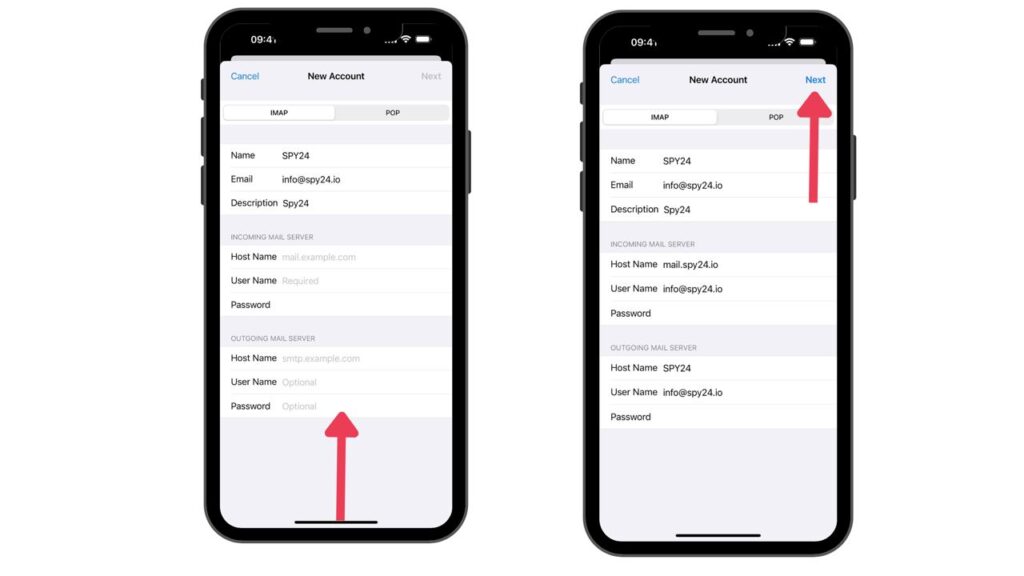
Note: Replace example.com in the above example with your domain name.
To proceed, tap Next in the top right corner.
9. At this stage, ensure the “Notes” synchronization is turned off. Also, set the “Mail” option to “ON“. To continue, tap save.
10. Go back to the “mail” section and then tap on the email account you have just added.
11. Tap on your email account again to display the settings.
12. Tap on the “Advanced” option at the bottom of the page.
13. Check if the folders related to your email account are correctly set up, as shown in the image below. These settings determine where your emails will be stored.
You should select the following folders on the server:
- Drafts: Drafts
- Sent: Sent emails
- Trash: Trash
- Archive Mailbox: Archived emails
Tap on the name of each section, and if a folder is not selected, choose the correct folder on the server.
14. Scroll down and enter “INBOX” in capital letters.
15. Click on “Account” at the top left corner, then click on “Done” to save.
16. As shown in the image below, your email account is now correctly set up on your iPhone with iOS 17.
Did you achieve your goal?
You’ve seen how adding an email account on an iPhone is incredibly easy. These emails can be easily managed with the Mail app. You can designate one email as your default email and enjoy the benefits of your other emails alongside it.