Moving WordPress to another host and domain becomes necessary when users intend to change their website domain. Sometimes it happens that due to hasty choices in domain naming, you may later find a better domain to set up your website, and this issue makes you decide to change the address in WordPress. Therefore, it is necessary to transfer the current site that you have built on the initial domain to a new host and domain. This is where you will need to transfer WordPress to another host, also for the process of moving WordPress from one host to another and likewise transferring WordPress to another domain. In this tutorial from SPY24, I intend to cover how to transfer WordPress to another domain. By using this tutorial, you can transfer your WordPress website from one host and domain to another host and domain in WordPress. So if you have also decided to change your host or change your domain, stay with us until the end of this tutorial to learn together how to transfer WordPress to another host.
Read more: My Website Has Been Hacked
How to Transfer WordPress to Another Host and Domain
The process of moving WordPress from one host to another host is similar to moving WordPress from a local Xampp host to a Cpanel host. The difference here is that the environment is different, plus, in the end, you should replace your new domain name with the old one. Therefore, it can be said that the work of moving WordPress from one host to another host will include the following items.
- Exporting existing files on the host
- Upload the extracted files to the new host
- Exporting WordPress database from the initial domain and host
- Creating a database in the new host and domain
- Importing the extracted database into the new host and domain
- Editing the WordPress wp-config.php file and entering the new database information
- Update and correct the domain address in such a way that you replace the new domain in the database with the previous domain
- Transfer and redirect users from the old domain to the new domain (optional)
Before transferring WordPress from one host to another host and domain, backup your WordPress database and the files on your host to quickly resolve issues by replacing the backup in case of an error or specific problem.
Now that you have taken a backup of your site and host, after going through the eight-step process, you will be able to move your WordPress from one host and domain to another host and domain. Please note that all these steps should be done carefully. Before you move to transfer WordPress to another host and domain, your new domain and the host should be properly connected by setting up the domain NameServers, and the host should be connected to the domain for any IP from any country. It usually takes up to 72 hours for the host to connect to the domain, so make sure the new host and domain are correctly connected, and then continue with the steps below to carry out the transfer of WordPress.
How to Export Data from a Hosting Account
In the first step, you need to log into the host panel. In this tutorial, we use a Cpanel host. So, by placing your domain in the link below and searching for it in your personal browser, your host management panel login page will be displayed.
Host Management Panel Link:
Place your domain address in the designated area “YourDomainName” and use the link. This allows you to enter your host management panel.
https://YourDomainName:2083/
On the displayed page, enter your host panel login details that have been sent to you via email to enter your host management panel.
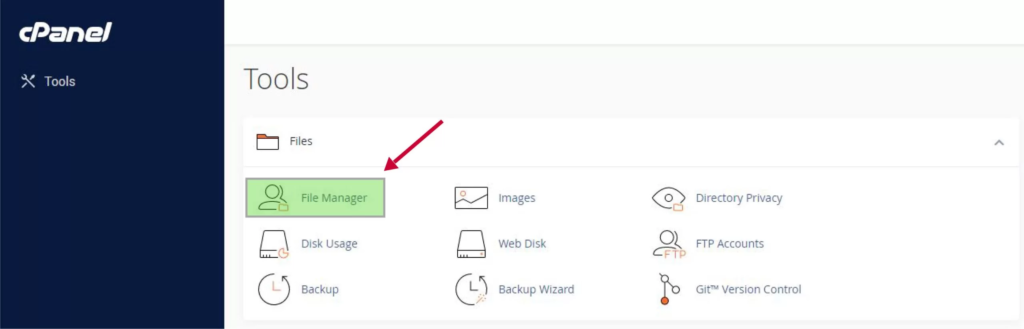
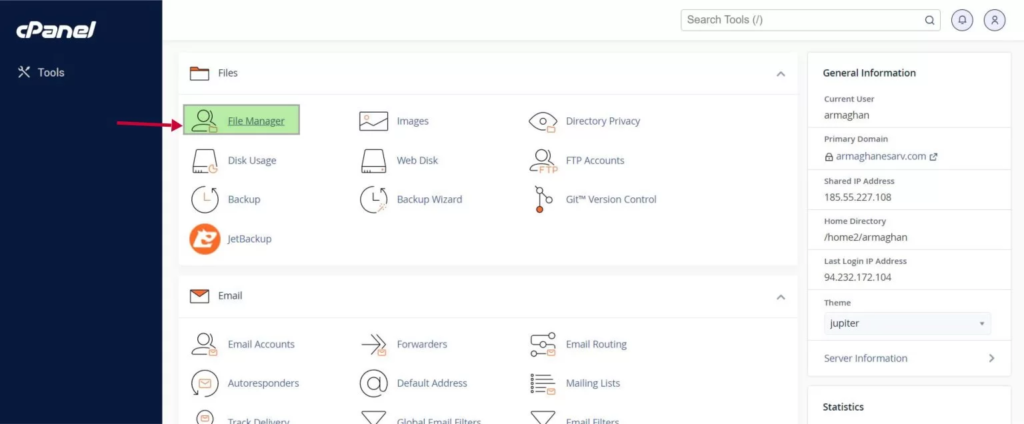
After logging into the host panel, as shown in the picture below, in the “Files” section, click on the “File Manager” option to open the file manager page for you.
On the opened page, in the box on the right side of the page, click on the “public_html” folder to enter your site root. After opening the main folder of the site, as shown in the picture above, click on the “Select All” option to select all folders and files in the root. After all, items are selected, click on the “Compress” option, as shown in the picture.
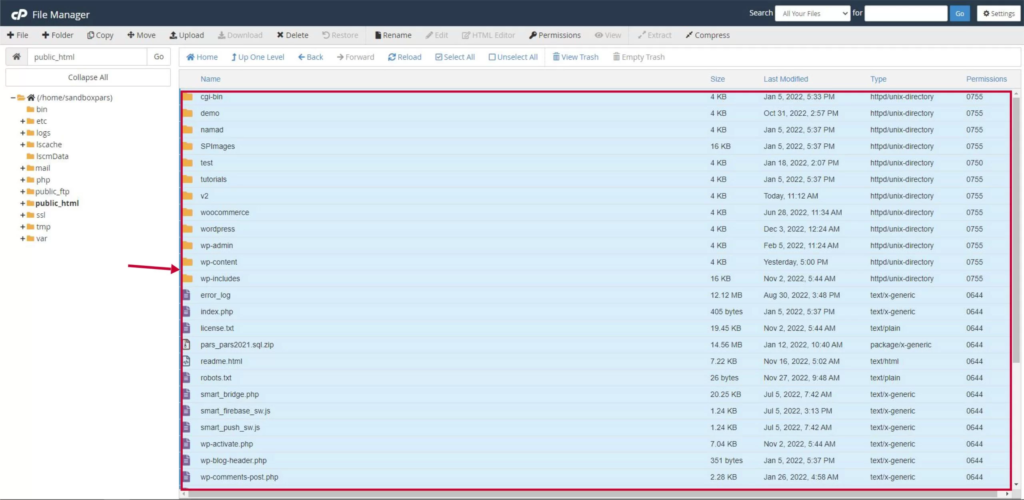
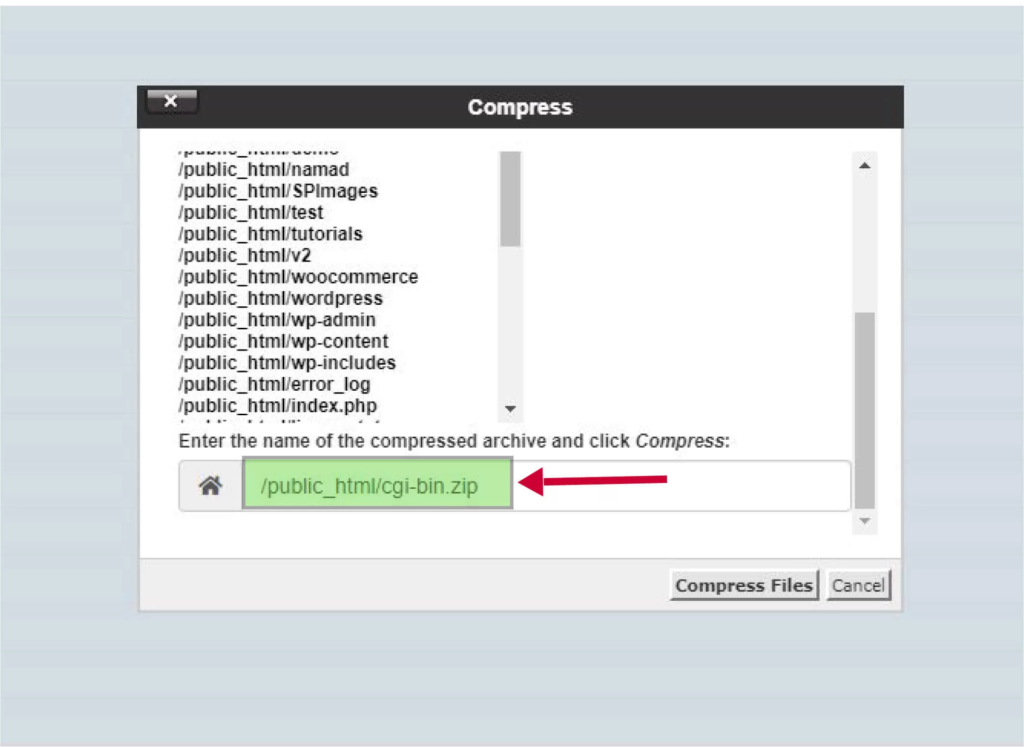
After clicking on this option, the page below will be displayed for you, and on this page, you need to specify the format and location of the desired zip file.

As shown in the picture, set the file format to zip and scroll down to specify the file storage location. As shown in the picture below, specify the file storage location, which we placed in the default location in the picture below, and then click on the “Compress File” button.
After completing the zip process, download and keep the zip file. You will need this file in the next step.
Uploading Information to the New Host
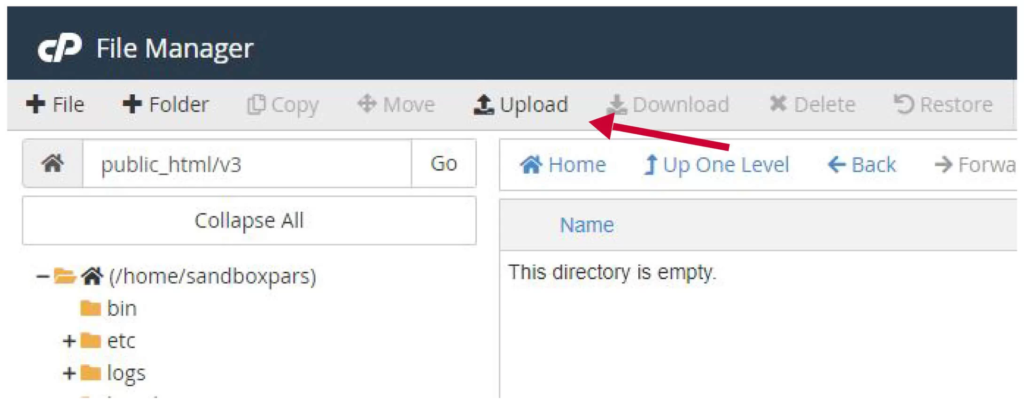
In this step, as in the previous step, you should first log into your new host’s management panel. Just like the previous step, enter the file manager section, and as shown in the picture below, from the right side menu of the file manager page, click on the public_html folder. Then, from the menu at the top of the page, click on the upload option.
After the upload page opens, drag and drop the exported file into this page and wait for the upload process to complete.
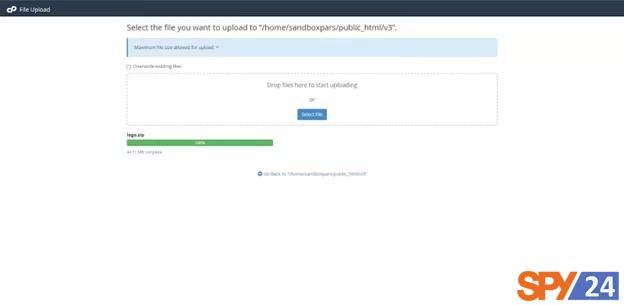
Once the process is completed, as shown in the picture below, click on the indicated option to return to the file manager page.

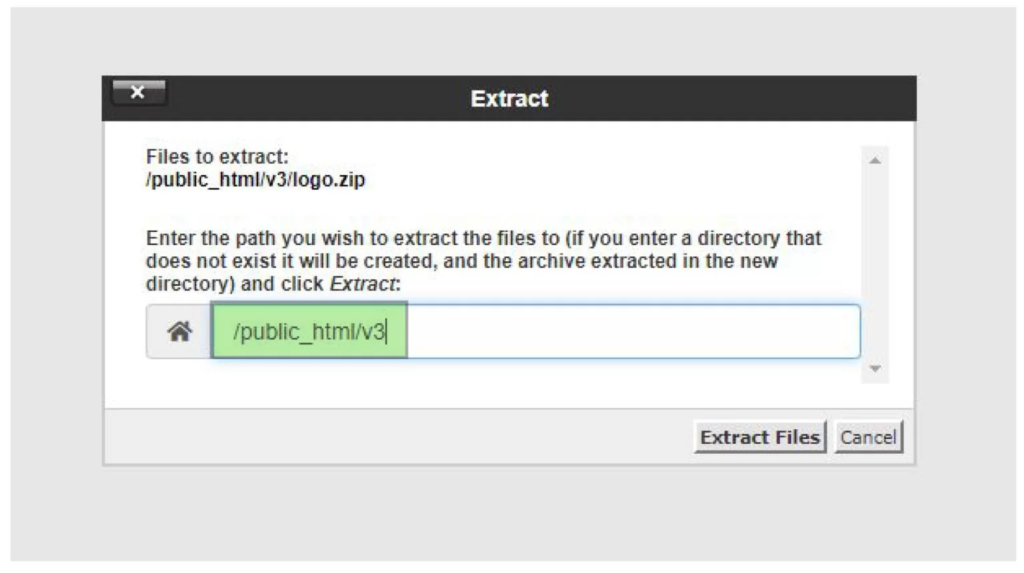
After returning to the file manager page, select the uploaded zip file on your host and, like in the picture below, click on the export option.
Instructions for Exporting the Host Database for Host Transfer
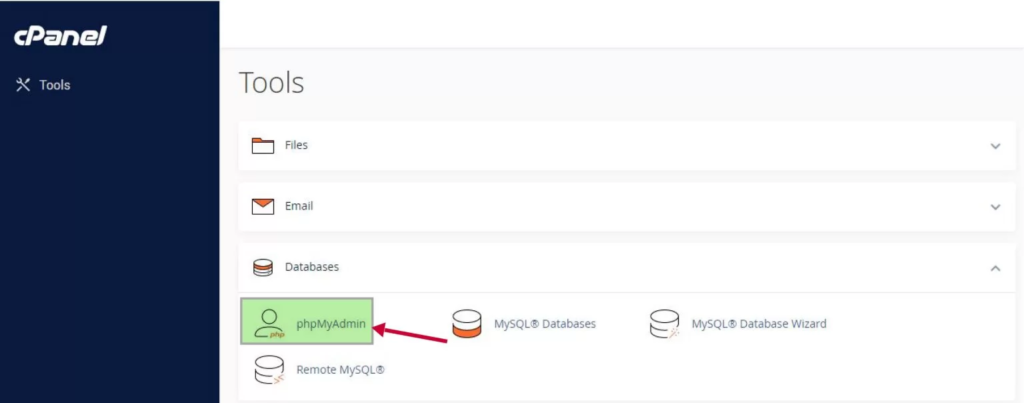
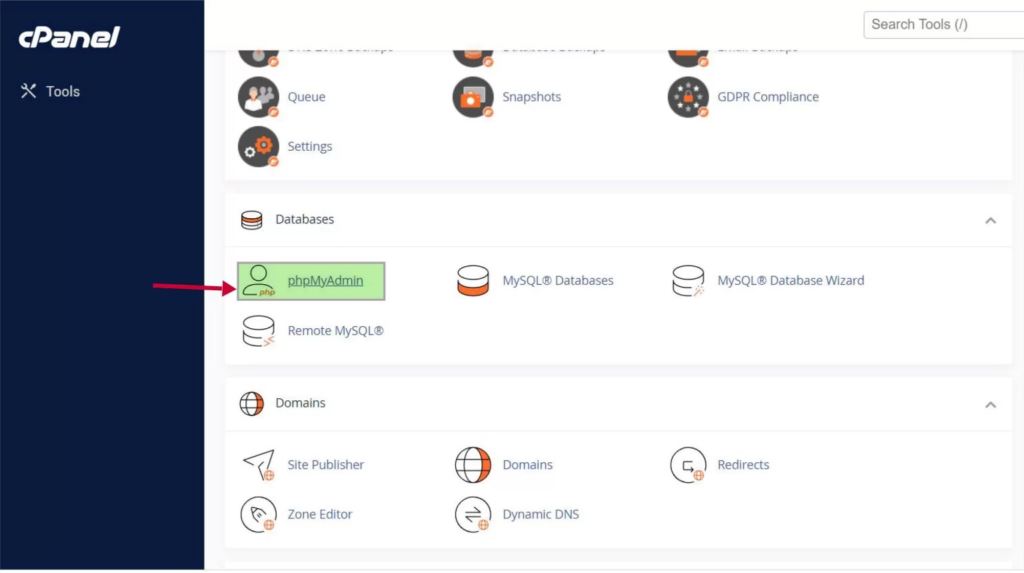
To export from the database, go to your old host, and from the database section, click on the “phpMyAdmin” option to open the management page of your website database, like the picture below.
After transitioning to the database management page, as shown in the picture, select your website’s database from the right and from the menu at the top of the page, click on the export option, and leave the output settings as default.
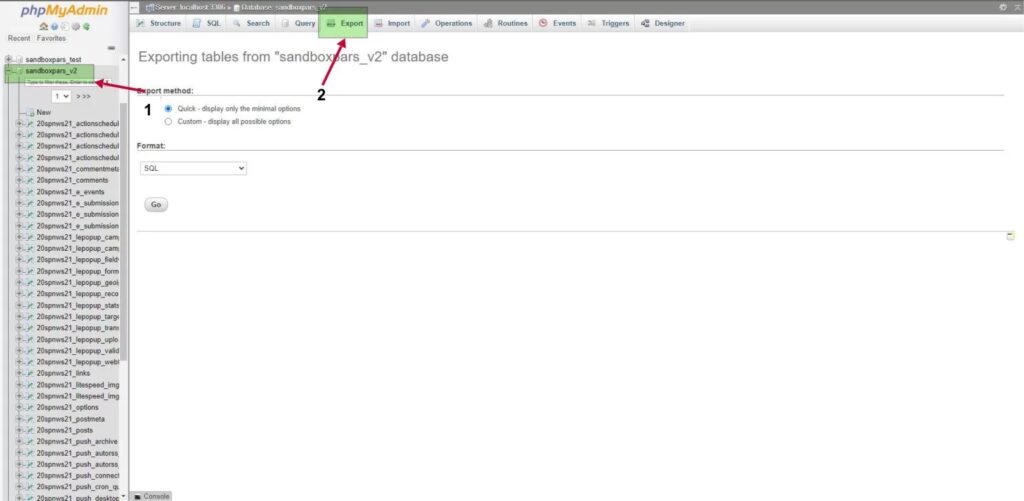
Then click on “GO” to execute the database output process and download the final file.
Tutorial on Creating a Database and Importing the Old Host Database for Host Transfer
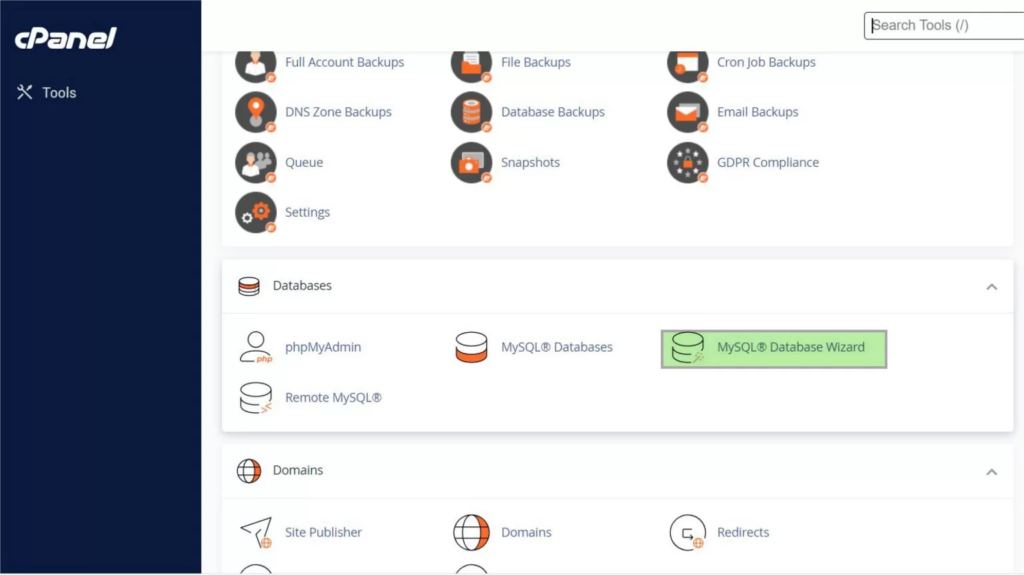
In this step, just like what was said in the past step, we first log into the host and then enter the “MySQL database wizard” section and start the process of creating a database.
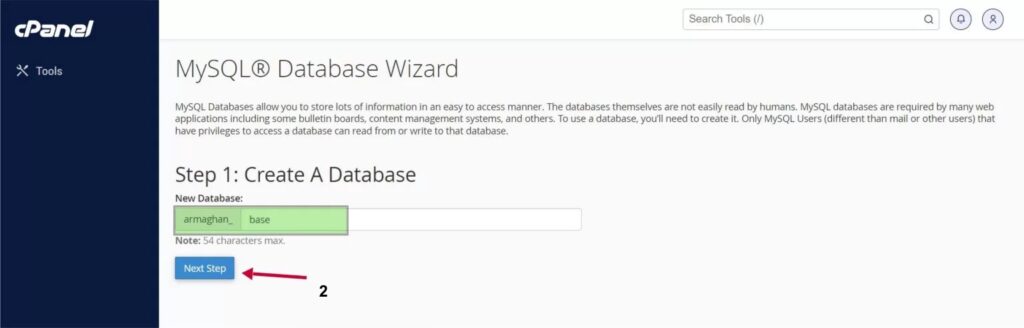
In the first step, we choose a name for our database. The maximum number of characters for choosing a database name is 54 characters. Then, we click on the “NEXT STEP” option to go to the next step.
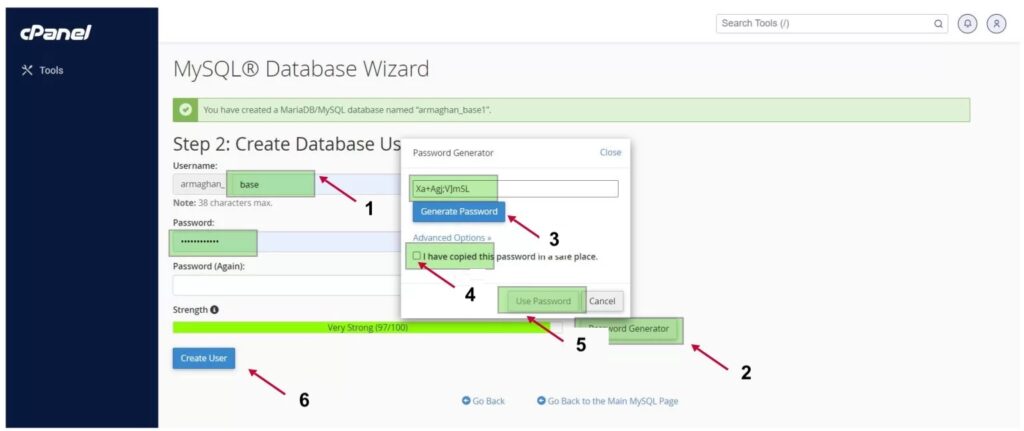
In this step, we choose a username and password for our database. We can use the “Password Generator” option to choose a password. This option automatically creates a strong password for us. In the “Password Again” section, we re-enter the password. Finally, we click on the “Create User” option so that the username and password will be created correctly for us. We are then automatically directed to the next step.
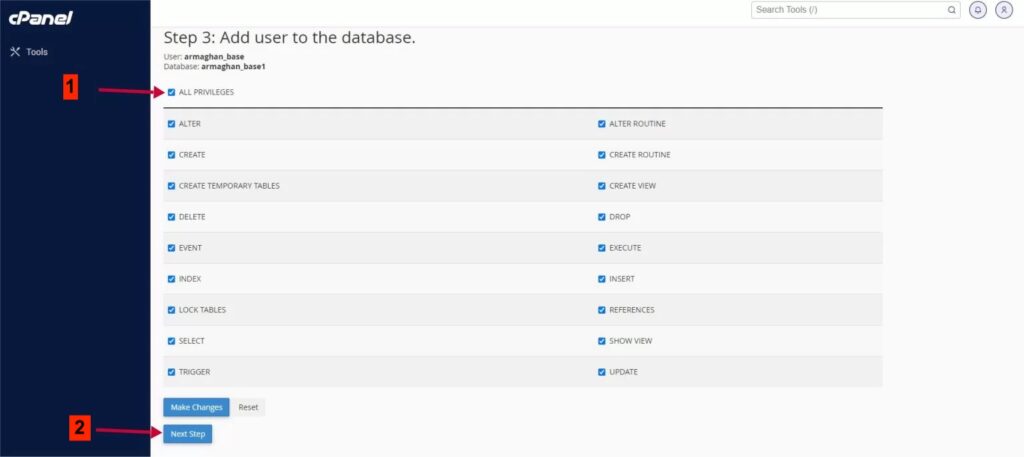
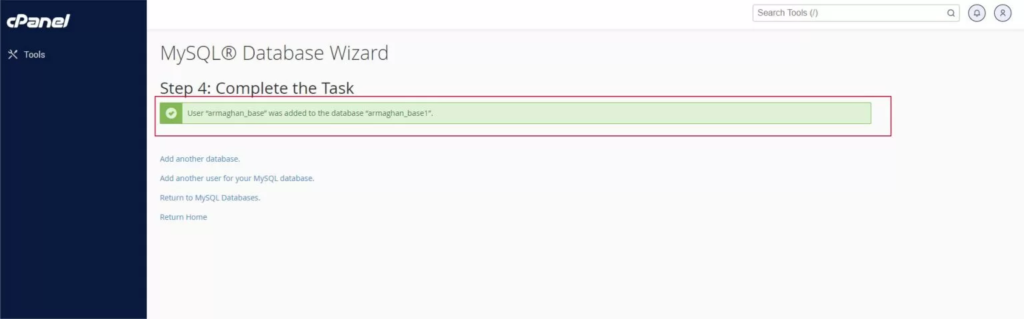
In this step, we need to establish all connections between the database and the created user, which is done by activating the checkbox for the “ALL PRIVILEGES” option. Finally, we click on the “Next Step” option. If all the steps have been done correctly, you will be shown a message based on the successful creation of the database and username.
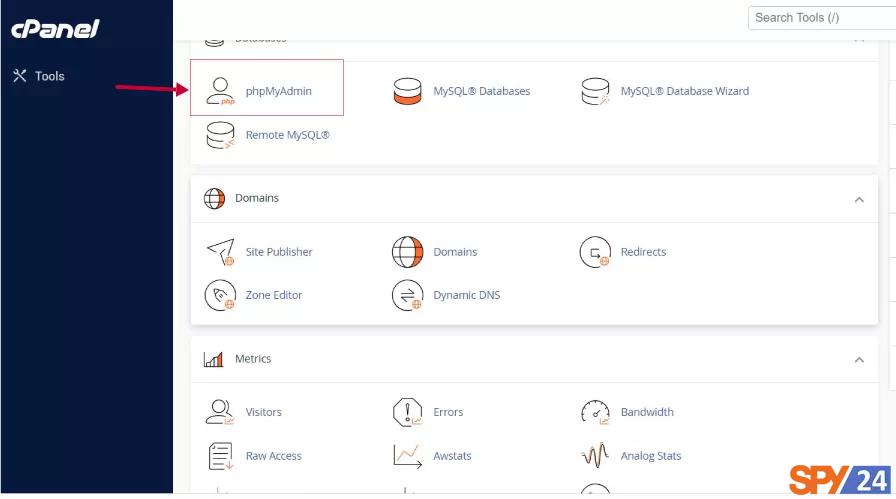
Now it’s time to import the database from your old host, for which we have obtained an export, into the new database we created. For this, we enter the “PHP My Admin” section on our cPanel page.
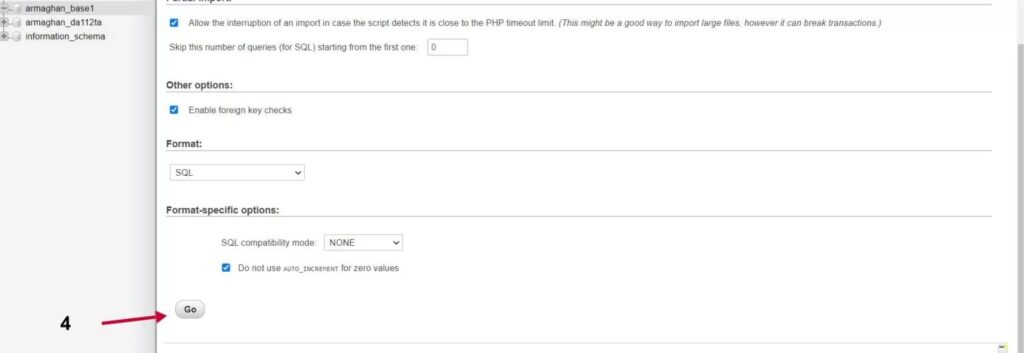
Then, we select the new database that we have created from the list on the left side of the page, and we click on the “Import” tab from the database. Then, using the “Choose file” button, we select our database export file from the system. Please note that we do not change the other options in this section, so they remain on their default setting.

Finally, at the bottom of the page, we click the “GO” button, which, if the steps have been performed correctly, will display a success message for us about the successful import of the database into the new host.
After the database has been successfully placed in the new database, it’s time to establish a connection between our WordPress files and the new database, which is done by editing the “WP_Config” file. In the next section, we will explain how to make this edit.
Tutorial on Introducing the New Database in the Wp-Config.Php File in WordPress for Host Transfer
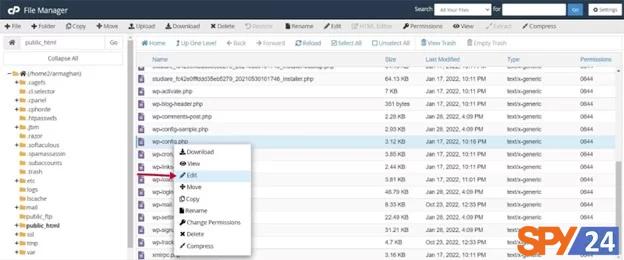
To introduce the new database in the wp-config.php file, we first need to log into the “File Manager” of our host and then enter the root of our website files, i.e., “Public-Html”.
Next, we select the wp-config.php file and choose the “Edit” option by right-clicking the mouse.
Upon selecting this option, a new page opens for us that displays the information inside this file, which can be modified and changed.
Here, we change the following three options:
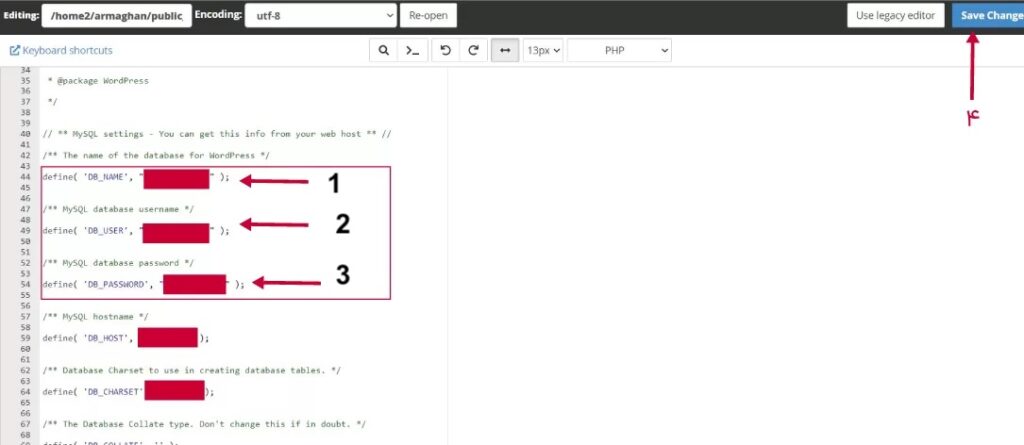
DB_NAME: In this section, we enter the name of the new database that we created in the previous sections.
DB_USER: In this section, we enter the new username that we created when creating the new database.
DB_PASSWORD: Finally, we enter the password of our username that we created in the previous steps.
Please note that these items must be entered carefully. If entered incorrectly, the connection between the files and the new database will not be established.
Updating the New Domain Address in the New Host Database for Host Transfer
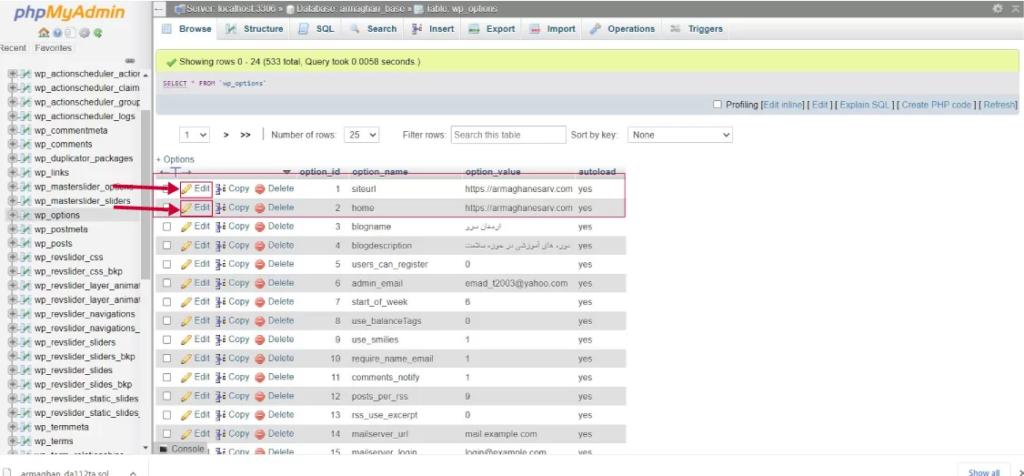
After completing the above steps, it’s time to replace the previous domain address with the new one in the database. To do this, we need to go to the “PHP Myadmin” section after logging into the new host, then select the new database that we have created from the list on the left side of the page and from the dropdown list of databases, select the “wp-options” option (Note: this option may start with a different prefix in some databases, but after the prefix, there is an Option option).
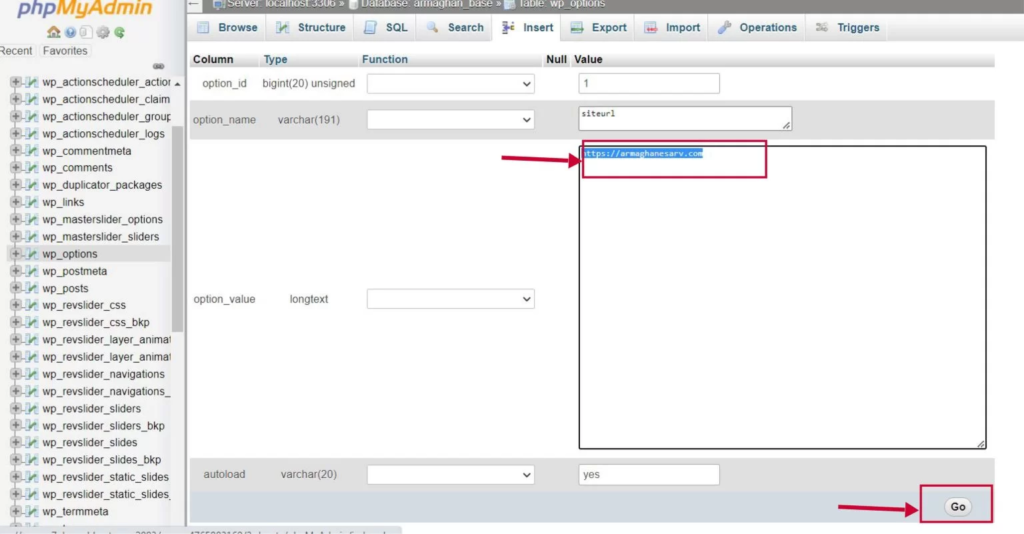
After selecting the “option” option, a new page will be displayed on the right where we need to change the URL address in the “Site URL” and “Home” sections to the new address. To do this, we need to go to the “Edit” option of each of these sections, replace the new address with the old one as shown in the picture, and finally hit the “Go” button.
After you have set the domain name for your site, to revert all existing links on the site to the new address, go to the “SQL” tab in the “PHP-Myadmin” section and put the following piece of code in it:
UPDATE wp_posts SET post_content = REPLACE (post_content, 'old-domain.com', 'new-domain.com/');WordPress 301 Redirect from Old Domain to New Domain
Doing this is entirely optional and depends on your situation. If you have a lot of links in your WordPress and the Google indexing process has progressed well, you definitely need to do this to register all the points for the new domain. But if the previous site has just been set up and there isn’t much information on it, you won’t need to do this. So, you should be able to fully transfer the site from the old domain to the new one by setting up a 301 redirect in WordPress.
As always, using a plugin can be the easiest thing for you to do. To do this, use the article “Tutorial on Redirecting Links to Each Other in WordPress” and transfer all your WordPress site pages from the old domain to the new one via a 301 redirect so that whenever a user visits a page on the old domain, they are transferred to the same page on the new domain.
But the story doesn’t end there, and you need to introduce the new domain to Google as well. You can also use the “Tutorial on Introducing a WordPress Site to Google” article and register the new domain in Google Webmaster. Finally, by doing these tasks, WordPress will have been properly transferred from one host to another and from one domain to another, and now you can manage and develop your site with your new and preferred address.
I hope this tutorial has been useful and to your liking and that you have been able to move WordPress to another host using this tutorial. In this article, we learned all the steps required to transfer WordPress from one host to another in such a way that how to transfer WordPress from one domain to another was also mentioned in it. Therefore, in addition to learning how to transfer WordPress in this article, we also learned how to change the domain in WordPress. In future tutorials, we will also cover how to change the domain address in WordPress. If you have any questions or problems about this tutorial, please announce them in the comments section, and I will respond as soon as possible.